43 Tools Knowledge: Stationary Power Tools
Learning Objectives
Demonstrate the safe use of stationary power tools.
Changing Blades
Blades are held in the chuck with an Allan nut, or a quick release mechanism. Unplug the saw before changing blades.
Tools Knowledge: Stationary Power Tools
This section will deal with the safe procedures involved with stationary power tools and related accessories. Tools covered are the power mitre saw and the table saw.
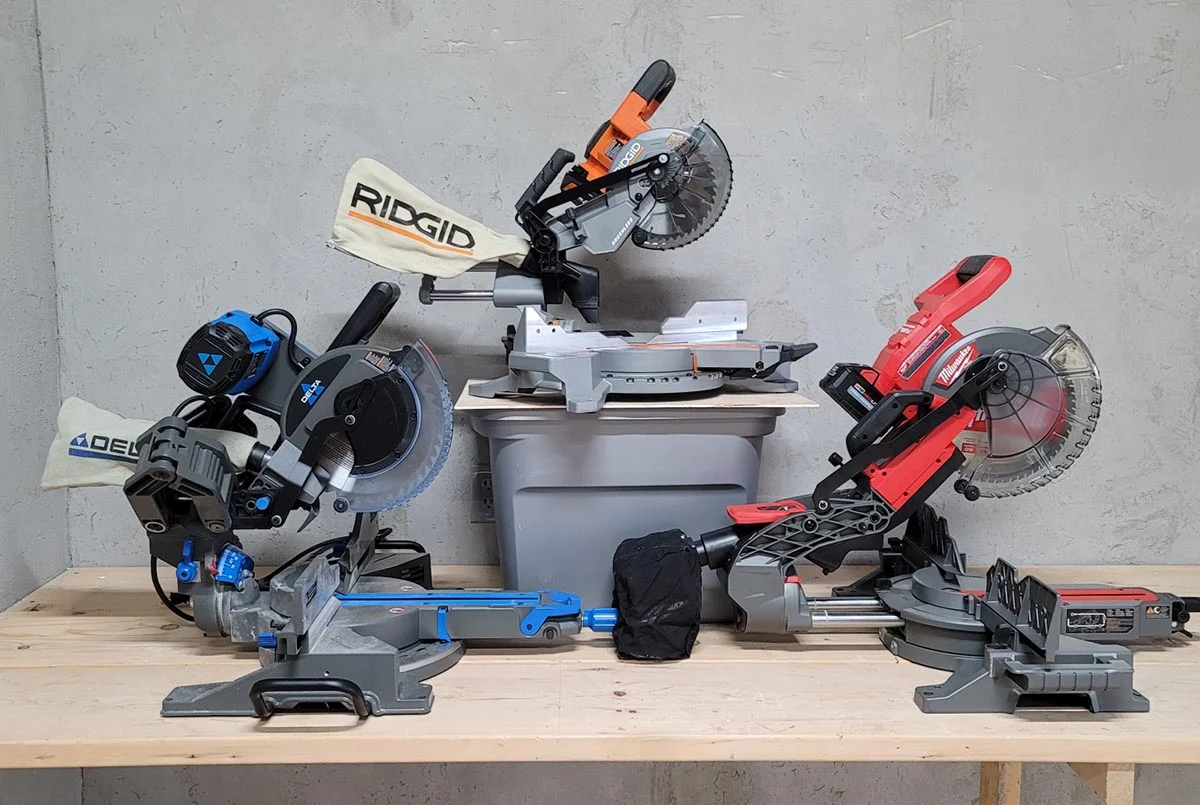
Compound Mitre Saw
This machine has features, which allow the cutting head to be tilted, as well as angled, in relation to the table. As shown in the enlarged cutting surface area, the saw has a precise gauge for mitre cuts. This works for left and right cuts and has several locking points at commonly cut angles. The mitre scale and the pointer would determine your desired mitre angle.
Sliding Mitre Saw
This saw has a sliding mechanism, which allows the cutting head to travel outward, not unlike the radial arm saw. This feature enables the saw to handle wider material.
The mitre saw, because of its versatility, has become a very useful tool on construction sites. They are mostly used in rough framing and finish carpentry such as cutting baseboards and casings. There are accessories available for the mitre saw. Use only those that have been designed to fit your machine and are suitable for the work being done. Follow instructions closely when fitting and using them.
Safety Features
Safety Release Button
As a safety feature, many models include a safety release button on the handle, which must be pressed before the trigger can be squeezed, starting the motor.
Automatic Brake
Some models also feature an automatic brake, which stops the blade rotation quickly when the trigger is released.
Blade Guard
All models are supplied with a blade guard as standard safety equipment. Be sure that the guard is on the machine, and operational, before starting the cut. The guard must cover exposed teeth when the carriage unit is in its upper “rest” position. It should function smoothly; allowing full protection as the carriage is moved downward, when making the cut. Do not remove the guard unit from the machine.
Setting Up the Machine
- Do not operate the saw on the floor or the ground. Mitre saws must be mounted on a workbench or other surface that will put the operating handle at approximately waist height.
- Operation of these machines is best when they are mounted in a long table which serves to extend the machine table and backing plate outward in both directions.
- Keep the work area well-lit and clean. This includes the floor around the working area, as well as the working surface. A dedicated lamp, lighting the work area, is a great safety benefit.
- This machine has a plunging motor head, which powers a circular blade, allowing for precise cut-off and mitre operations. The motor head can be adjusted in relationship to the table, right or left, to an angle of 45 degrees or beyond.
Mitre Saw Blades
- Mitre saw blades come with the same features as a circular saw, but also must be rated to operate at a speed of 6000 rpms or higher regardless of the type of blade installed. Another difference would be noticed in the size of the arbor hole.
- The direction of the blade rotation helps to pull the material against the backing plate, and downward onto the saw table. Care must be taken to ensure that the blade is mounted in the correct orientation, with exposed teeth pointed toward the backing plate. Use a crosscut or combination blade, and keep it clean and sharp at all times.
- There are several factors to consider when determining smoothness of cut areas such as: material to be cut, blade design, blade sharpness, and rate of cut.
- When selecting a blade, keep in mind the type of cut desired and the operational speed of 6000 rpm’s or better.
- When changing a blade ALWAYS remember to first unplug the saw.
- Wear safety glasses, and/or a face shield. A dust mask and hearing protection may also be necessary.
- Tie back long hair. Do not wear loose clothing or gloves while operating this machine.
- Ensure that all wrenches and tools are removed from the machine, and that the motor switch is in the “off position before plugging it in.
- Take the time to correctly perform an operation. Generally speaking, the slower the blade goes through the material, the smoother, the more accurate and the safer the cut will be.
- To check for squareness of the blade in relationship to the fence, place a straight piece of 2 x 4 against the fence and cut. Use a square and check the squareness of the cut. Adjust if necessary.
- Do not cut pieces shorter that 20 cm/8″. These pieces have a tendency to move after they are cut and are prone to catching in the blade and being ejected forcibly.
- Do not store materials to be cut behind the mitre saw. This will cause you to reach over the machine, or behind the blade. Keep all activity on the operational side of the machine where you can be sure of your footing and balance.
- Adjust the angle of cut by unlocking and turning the saw mechanism in relation to the backing board. Be sure that the locking handle is turned tight again before starting the motor.
- Do not attempt to hand-hold unsupported material which cannot be placed securely on the saw table and against the backing plate. Make sure that all parts of your hand are well clear of the cut line.
- The machine is operated by holding the material, usually with the subordinate hand, securely on the table, and against the backing plate. The dominant hand grasps the motor handle and starts the motor. Never cross hand a tool.
- After letting the blade reach operating speed. the motor (and blade) carriage is lowered through the material.
- Cut through the material and continue downward until the stop point is reached before releasing the trigger. Allow the blade to stop completely before removing the off-cut piece and returning the carriage to its upright position.
- Do not remove your hand from the carriage handle until the blade guard has covered the blade area completely.
General Maintenance
Unplug the machine, and follow the manufacturer’s instructions when changing blades or making other adjustments. With the blade removed, check the machine body, the pivot mechanisms, and the electrical cord and plug. Also check the saw table and backing plate for cracking and wear. Blow accumulated dust from the motor cooling ports, blade guard, and adjustment mechanisms before installing the blade. Wear a dust mask while doing this.
Blade thrust washers must be replaced so that the raised outer rim collar (if there is one) is against the blade, supporting it on the outer edges. Cracked collar washers should be replaced immediately with the correct part. If repairs are needed, do them immediately, before the machine is used again, using only the proper parts.
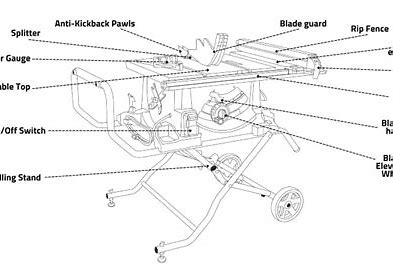
Table Saw
Parts of a table saw

Description
The Table Saw is designed to perform rip, cross, beveled, and angled cuts with precision. There are many types available that are capable of doing a great variety of jobs. As with all tools, different sizes and configurations are available. As the name implies, the saw cuts by way of an adjustable blade protruding through a table top.
There are six basic cuts that can be performed with a table saw. These are, rip cutting, cross cutting, mitre cutting, bevel cutting, bevel cross cutting and compound mitre cutting.
Traditionally, table saws have used externally-mounted motors, which transmit power to the blade through the use of a v-belt drive. These machines require regular maintenance, inspecting the tensioning of the belt, and checking the belt for cracks. The motor pulley must be aligned to the blade drive pulley on the carriage assembly underneath the table.
Fence
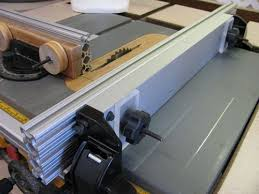
The fence that runs parallel to the blade is called the rip fence. It is used only for that purpose, which is to cut material along its length. It is adjustable and lockable at any point along the width of the table.
Never use the rip fence when making a crosscut, and never use the rip fence as a stop for crosscutting procedures. The material will become jammed between the blade and the fence and will be forcibly ejected.
Mitre Gauge
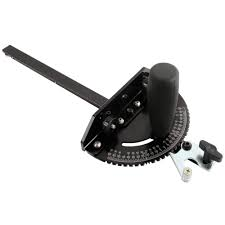
The crosscut gauge or mitre gauge slides on its bar in either of two grooves in the tabletop. It is designed to hold material for cutting across the grain. It is adjustable and lockable at any angle up to 45 degrees right or left, in order to handle crosscuts, angles, and mitres. Hold material tightly, preferably with clamps, against the mitre gauge when preparing to make the cut. To check the gauge for 90 right angle to the blade, position the gauge upside down in the slot. Slide gauge against the rear of the table. Adjust if necessary and tighten locking knob.
Jigs
Many operations that would be unsafe using the table saw can be done safely by using the correct jig in order to properly hold the work. Books are available which explain jigs, their uses, and construction. Read and use the information presented in these books.
Safety Features
Safety Release Button
As a safety feature, many models include a safety release button or a key, which must be inserted and turned before the motor can be started. This is especially important if children are to be present in the workshop.
Automatic Brake
Some models also feature an automatic brake, which stops the blade rotation quickly after the motor is stopped.
Guards
- Most table saws are supplied with a blade guard to deflect debris away from the operator and to keep fingers out of the blade.
- The blade guard should allow the blade to be tilted, raised, and lowered without removal or adjustment. Most standard guards fit into the splitter groove, which is the slot in the table insert directly behind the blade. These units must be removed when using dado blades, or when making cuts that do not penetrate the material.
- Accessory blade guards are also available which allow the use of dado blades. These are independent, overhead units, which are either mounted to the floor or the saw table. Some guard units have an electrical cut-off switch, disabling the saw motor or sounding an alarm until the guard is in position.
- Be sure that the guard is on the machine, and operational, before starting the cut.
- The guard must cover exposed teeth when it is in its “rest” position. It should function smoothly, allowing full protection, and yet flip out of the way readily for measuring. It should also function smoothly when rising above incoming material at the beginning of the cut.
Splitters
The splitter is a tracking device. It is probably the most effective anti-kickback device available because it keeps the material from moving sideways into the blade and being caught by the rotating teeth.
Splitters are metal fins, secured behind and in line with the blade that protrude through the blade slot. Some are higher than the blade itself, with anti-kickback pawls or a dust guard attached. This type must be removed when a shallow cut is made, where the blade does not cut completely through the material.
Operations and Set Up
- Free standing pedestal-type table saws should be solidly anchored to the floor. Bench-type saws must be mounted on a workbench or other surface, which will put the operating table at approximately waist height.
- Operation of these machines is simplified by mounting them in a long table. This extended machine table behind and to the sides of the blade will help support incoming and outgoing material.
- The saw table can be waxed to allow material to slide over it freely. First, unplug the machine and lower the blade completely.
- To avoid accidents, keep the work area well-lit and clean. This includes the floor around the table saw working area, as well as the working surface. A dedicated lamp lighting the work area is a great safety bonus.
- The on/off switch for this machine should be located at knee height. This will allow it to be shut off with your knee when both hands are still on the material, as may be required in some situations. A knee-operated “paddle” switch can also be considered.
- Material should be placed with the good side up for a smoother cut.
- The blade will tilt at any angle to 45 degrees to the right by unlocking and turning the tilt hand wheel under the side of the table. Be sure to tighten the locking screws after each adjustment.
- The depth of cut is adjusted by unlocking and turning the elevating hand-wheel located at the front of the machine. Set the blade so that its tip will clear the material by about 1/4 inch, or .5 cm.
Table Saw Blades
This information will describe the saw blades commonly used in the carpentry trade. Generally these come in sizes ranging from 7 ¼ ” (175mm) to 14” (350mm) in diameter.
These blades come in the following types:
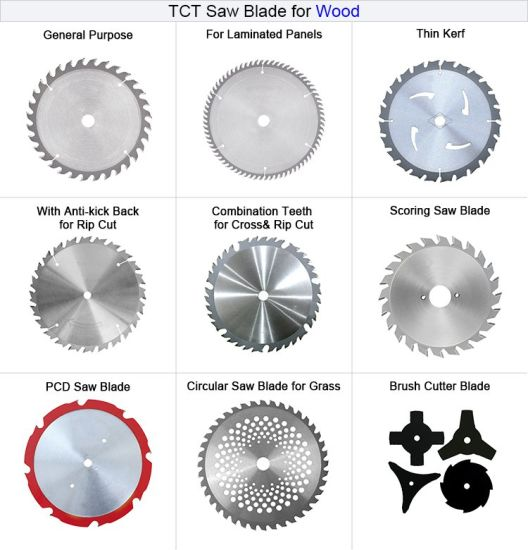
Table Saw Blade Installation
Unplug the saw.
Remove insert plate by pressing down on the back of it. Remove arbor nut counter-clockwise and replace blade. When the blade is installed correctly, the points of the teeth will be facing you, as they rotate forward and downward into the table. Material must be fed into the blade against the direction of rotation. Use the proper blade for the cut, and keep blades clean of pitch and gum by using a solvent such as turpentine. Sharp blades cut cleaner and are safer to use.
Never use a blade that has chipped or missing teeth.
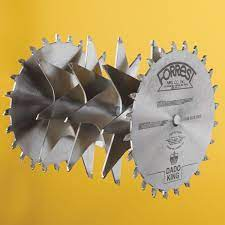
Dado Heads
A Dado head is another useful blade for the table saw. It is used for cutting rabbets which are grooves taken off the end of a piece of material, and dadoes, which are grooves cut into the surface of a piece of material.

Rip Cuts
Traditionally, a rip cut involves cutting a board lengthwise, with the direction of the grain of the wood. This definition has become obsolete with the development of sheet materials. For the sake of these new materials, a rip cut is performed when the part that passes between the blade and the rip fence is longer than it is wide. Using a combination blade, ensure that the fence is exactly parallel to the blade. After letting the blade reach operating speed, the material is fed along the fence, and into the blade. When ripping, stand to the left of the material and push the material against the fence with your left hand, while pushing it through the blade with your right. Never stand in line with a rotating saw blade. When completing a rip cut, use a push stick to feed the material completely past the blade especially when material is narrow. If you are ripping on a bevel, ensure that you set up with the blade tilted away from the fence. Use a sliding T-bevel to set angles on the saw or the mitre gauge.
Cross Cuts
Traditionally, a crosscut was made when a board was cut across the grain. Now with the use of sheet materials, a crosscut is made when the piece to be cut off is wider than it is deep. When crosscutting, position the larger part of the material against the mitre guide, and hold only that part preferably with clamps. Never use the rip fence as a stop for crosscutting. If you’re doing multiple identical length cuts, use a stop block.
Maintenance
Unplug the machine!
Follow the manufacturer’s instructions when changing blades or making other adjustments. With the blade removed, check the mandrel assembly, the pivot mechanisms and the electrical cord and plug for cracking and wear. If repairs are needed do them immediately, before the machine is used again, using only the proper parts. Blow accumulated dust from the motor cooling ports, blade guard, and adjustment mechanisms before installing the blade.
Blade thrust washers must be replaced so that the raised outer rim collar is against the blade, supporting it on the outer edges. Cracked collar washers or arbor nuts should he replaced immediately with the correct part.
Be very careful when operating this machine; it is probably the most dangerous machine in the workshop. Observance of safe working procedures is vital. Never attempt to “freehand” a piece through the table saw. Always use fences, push sticks, and jigs. Do not attempt to hand-hold unsupported material which cannot be placed securely on the saw table, and against the fence.
Always use a push stick when working close to the blade. If cutting thin stock, or strips, or performing any other procedure where you are working close to the blade, use a push stick in each hand.
Metal fences should be protected with a wooden faceplate to prevent blade-to-metal contact during close operations.
- Wear safety glasses, and/or a face shield. A dust mask and/or hearing protection may also be necessary.
- Tie back long hair. Do not wear loose clothing or gloves while operating this machine.
- All wrenches and tools must be removed from the machine, and the motor switch in the “off” position before it is plugged in.
- Before setting up a cut, be sure that the floor area is clear of obstructions, and that both the saw table and runoff table are clear of debris.
- Check the material for splinters, or loose knots that may fall off during the cut. Do not cut old, painted, or nailed material.
- Before starting the machine, rehearse the cut in your mind. Where will you put your hands during each phase? Is there a push stick at hand? Do you need two push sticks? Is a feather board needed?
- If your machine is not connected to a dust extractor, wear a dust mask.
- Always stand to one side of the saw kerf (the cut created by the saw blade), so that any material or loose saw teeth thrown back by the blade will pass by you. Never place your hands, head, or body in a line directly in front of the rotating blade.
- Never reach behind the blade.
- Cut through the material, and continue pushing the material until it is well past the rotating blade before turning off the motor.
- Allow the blade to stop completely before removing the off-cut piece, and before taking measurements or making adjustments for the next cut.
- Do not store materials to be cut behind the table saw. This will cause you to reach over the machine, or behind the blade. Keep all activity on the operational side of the machine, where you can be sure of your footing and balance.
- Take time to correctly perform an operation. Generally speaking, the slower the blade goes through the material, the smoother, the more accurate, and the safer the cut will be.
- Keep your attention from wandering. Hands must be well clear of the blade travel, and all fingers accounted for, before each cut is made. If you find your mind wandering, take a break immediately.
- Extra care must be taken when working with small pieces. Pieces shorter than 20 cm. (8 inches) in length have a tendency to move after they are cut off, and are prone to catching in the blade and being ejected forcibly. Do not grab at them.
Kickback
The back of the blade, as it rises out of the table, creates the critical “kickback zone”. As material passes by this area of the blade, it has a tendency to be lifted off the table. If it moves slightly sideways at this point, it will be caught by the rotational motion, and will be flung back toward the operator.
The chances of kickback occurring can be greatly decreased by taking some common-sense steps toward its prevention:
- When material with internal stresses are cut they bend. This is because the stresses must be neutralized. Sometimes material bends inward and pinches against the back of the blade. Use of a splitter will help to solve this problem, as will a wedge inserted into the saw kerf to separate the material.
- The fence should be kept perfectly parallel to the blade by aligning it with the mitre gauge groove.
- Short, wide material poses a special problem. It is difficult at this point, to distinguish between a “rip” and a “cross cut”. If using the rip fence, the material must be held tightly against it as it goes through the blade. Use of a feather board can keep material secured against the fence or table top.
- Blades can become overheated if the feed is too slow or if you are using a dull blade.
- Install a splitter. Anti-kickback pawls, although effective, must be removed when making shallow cuts, and re-installed promptly.