49 Doors
Learning Objectives
Type your learning objectives here.
- Select appropriate construction materials and tools.
- Demonstrate hanging or repair of a door.
Description of Doors, Frames, and Hardware
Most doors used in housing units are shipped to the site complete with frames.

Interior Doors
Interior doors are usually hollow core flush doors. They are light weight, made of thin front and back plywood (1/8”), with strips of cardboard or lattice work to keep the two panels apart. The side edges have a strip of 2” solid wood, and the top and bottom have a strip of 3” solid wood.
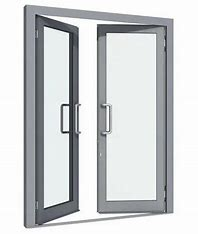
Exterior Doors
Exterior doors are solid core, 1 3/4 inch thick. Most exterior doors have a metal skin.
They are 6’ 8” high and 36” wide.
Door Frames
Door frames consist of two side jambs and a head jamb. The width must be equal to the thickness of the finished wall. Refer to the drawing below.
Hardware
Door hardware consists of the hinges, the lockset and the striker plate.
The most common residential locks are the cylindrical and tubular locks. When replacing locks, replace the old lock with the same back set as the one being replaced and follow the manufacturer’s instructions that come with the lock.
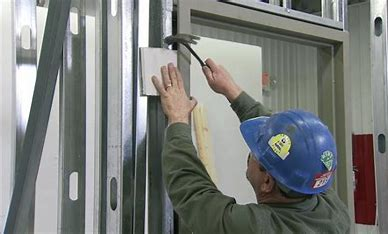
Repair and Maintain Doors
There are many ways that doors can become damaged. The hinges or the locks will wear out. The house can settle so that the door sticks in the frame. You may even have to cut a hole in a wall to add another door sometime.
Replace Hinge Screws
- Drill out the hole.
- Fit and glue in a wooden plug which fits the hole. Make sure it is a tight fit.
- File or sand off any part of the plug sticking out of the hole.
- Drill a small hole for the screw in the plug.
- Replace the screw in the hinge.
Replace Door Hardware
- Replace a door hinge.
- Remove the hinge pins holding the door. Hold the door so that it does not fall down.
- Remove the door.
- Remove and replace the hinges.
- Replace the door and insert the hinge pins.
- Replace the Lockset.
- Remove the doorknob. This includes the doorknob, lock mechanism and striking plate. Release catch or set screw on the doorknob handle, or by removing the exposed screws on the inside rosette.
- Remove the screws holding the mounting plate and remove the old unit.
- Install new lockset. Follow the manufacturer’s instructions.
Repair a Damaged or Broken Door Jam
- Remove the hinges or striker plate, depending on which side is damaged.
- Remove the door, if the hinge jamb is damaged.
- Remove the damaged casing. Pull the finishing nails through the back of the casing.
- Replace the parts of the casing that are damaged, and check remaining casing to insure that they are plumb and level. Adjust if necessary.
- Replace the door, striker plate, and hardware.
- Check the door for proper fit and swing. Shim the hinges if necessary.
Note: there is also a metal sleeve that can be used to repair door jambs by fitting over the broken or cracked section. This is available from lumber/hardware stores. Follow manufacturer’s instructions to install.
Repair a Sticking Door
- Remove the door.
- Sand or plane the edges that bind on the jamb.
- Replace the door, and check to make sure that it fits properly.
Installing Doors
Install a Door in an Existing Wall
- Locate existing wiring and piping.
- Cut away interior wall covering.
- Re-route electrical wiring and piping.
- Support existing ceiling.
- Measure out the required wall opening.
- The wall opening must be 2 1/2 inches wider than the door size, and 1 inch higher than the door height. In addition, the hole you cut must be 6 inches wider and 5 1/2 inches higher than the rough opening. This will allow for the king and trimmer studs and the lintel.
- The rough opening is normally 1 inch wider than the width of the door frame.
- Lintels are installed over doors in load bearing walls to distribute the weight, non-bearing walls do not require a header over the door.
- Interior doors do not have a sill. Exterior doors need a sloping sill or a threshold at the base of the jamb.
- Frame the rough opening.
- Cut and nail the king studs.
- Cut and nail the trimmer studs.
- Cut and nail the header.
- Cut and nail the cripple studs above the header.
- Hang an interior door.
- Make sure the door frame is the correct width for the wall.
- Prop up the door unit so the door is 5/8” to 1” above the floor level, and centered in the wall. You need 1” above the floor if the room is carpeted.
- Insert shims to hold the door in place. Shim behind the hinge and striker plate portions of the jamb since these are the main stress points.
- Level the head jamb and adjust the shims if necessary.
- Check hinge side jamb for plumb (in both directions) and adjust if necessary, using a spirit level.
- Nail through the hinge side jamb through each shim into the trimmer stud.) Close the door and adjust the height of the other side jamb to until the space between the door and the top jamb is even across the top of the door.
- Shim the other side jamb to get an even space between the side jamb and the door.
- Nail through the jamb and the shims into the trimmer studs.
- Nail the top jamb if necessary. It is important that the hinge side jamb is plumb in both directions in order for the door to swing properly. The striker jamb can be adjusted to the warp of the door up to the point where it would make installing the trim difficult.
- Install a lockset.
- Install the lockset.
- Check the door to ensure that the striker plate is in the right location and that the door closes properly.
In most pre-hung doors, the hole for the lockset is already drilled. All you have to do is insert the lockset, following the manufacturer’s instructions.
- Repair the inside finish,
- Cut and nail the wall panels or drywall or patch holes around the door opening.
- Prepare the drywall for paint.
- Paint the drywall.
- Nail the inside trim boards into place.