40 Fundamental Tools Knowledge_new
Basic Hand Tools
First, we will examine the main tools that carpenters use.
Carpenters tool belt
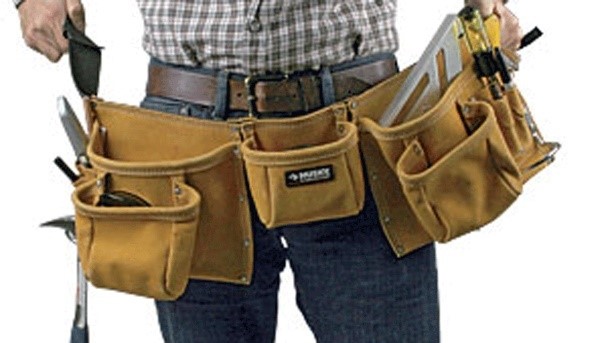
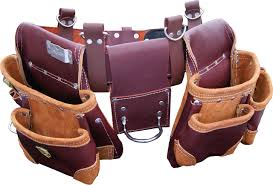
Carpenters tool belts come in several sizes and number of pouches, The extra pouches are used to carry the variety of tools that would be needed for your daily tasks, they are also used to carry the different fasteners as well.
Carpenter’s Apron
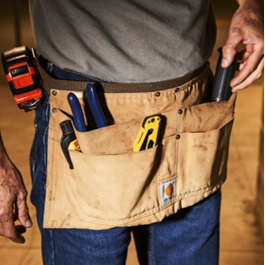 These pouches are more suited to the carpenter’s helper, and although they have fewer pouches, they will do fine for the beginning carpenter and are relatively inexpensive. The beginning carpenter should look for a pouch that has a leather belt, steel hammer holders, and fairly large baggy pouches.
Hammers
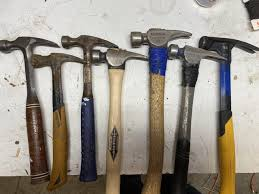
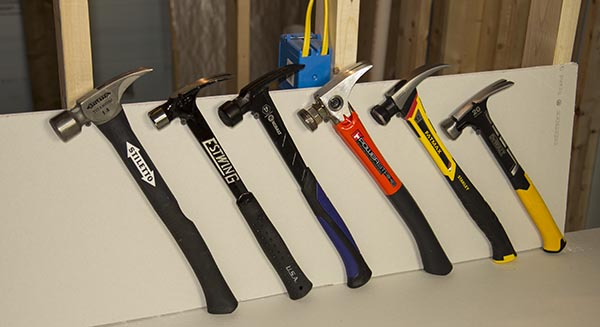
Hammers were originally used just for striking. However, they have gone through many changes and are now a very different tool.
The materials used in making hammers has changed as new technologies have been developed. Quality hammer heads are made of tough alloy steel treated for strength. The handle may be hardwood (hickory or ash), fibreglass, or steel. The fibreglass and steel handles usually have a type of rubber or leather grip to prevent slipping and to reduce shock.
Selection
Hammers are sized by the weight of their heads. Important as it is to choose the correct weight of hammer for the job, it is equally important to select a hammer that feels “right” for you. You should choose a hammer that feels “balanced” and comfortable in your hand. The most common sizes are 13, 16, 20, 22, 26 and 28 ounces. For heavy nailing, a 20 ounce hammer or better is usually required. Some framers use hammers up to 30 ounces.
The curved-claw hammer is best for pulling nails while the ripping – claw hammer is preferred for prying apart woodwork.
Face
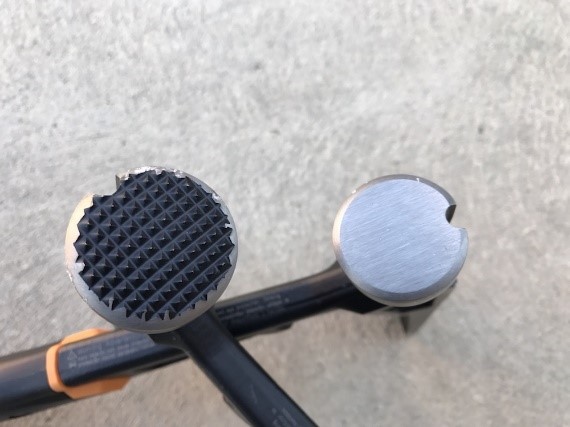 Hammer faces are either smooth or milled to a serrated surface which prevents nails from slipping off the face of the hammer. However, it leaves an imprint on the surface of the wood when nails are hammered flush so it is not recommended for finish work.
Correct Method and Techniques for Using a Hammer
The hammer should be held firmly near the end of the handle. Depending on the strength of the blow needed, the wrist, elbow and shoulder or all of these are used in the process. Set the nail and rest the face of the hammer on the nail’s head. Draw the hammer back and give the nail a light tap to start it, then drive nail with greater force while retaining control of the hammer. The head of the nail should be hit squarely with the face.
To maximize the holding power of nails, consider the following:
- Always nail through the thin piece of wood into the thick piece.
- Do not place nails too close together in line with the grain of the wood.
Techniques for Using a Hammer (maximize the holding power of nails) (cont’d)
- When possible, nail through the cross grain instead of the end grain.
- If not possible, the nails should be driven at an angle to increase their holding power.
- Do not nail too close to the edge of the board.
- Hammer nails in a staggered pattern to distribute the holding power.
- Do not use nails with a larger gauge than required.
- Blunting the tip of the nail will also decrease the likelihood of slits in thin boards and hardwoods. (this is done by hitting the tip of the nail with a hammer)
- If it is not possible to fasten the wood by end-nailing, a technique called “toenailing” is used. Half of the nail should be in both pieces fastened.
- Finishing nails are usually “set” below the finished surface to accommodate further finishing. This requires the use of a tool called a nail set.
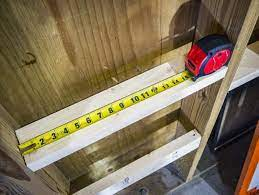
Tape Measures
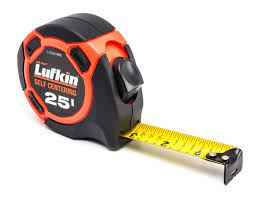
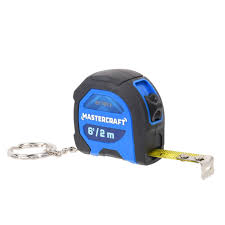
Pocket Measuring Tapes

Taking an Inside Measurement:
- Place hooked end of tape against one side of the opening.
- Uncoil tape across opening.
- Butt tape case against opposite side of opening
- Take reading at edge of tape case.
- Add width of tape case to obtain correct measurement.
Taking an Outside Measurement:
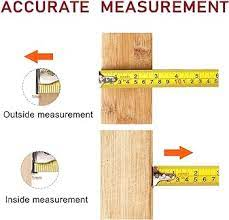
- Pull tape out from the case and hook the end of the tape over the end of the object to be measured.
- Read dimensions on tape.
- Observe which dimension lines up with the point to be measured.
Discuss:
Squares
Speed Squares
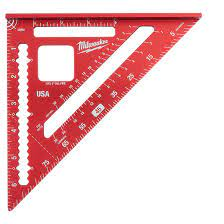
Used to check for square and to layout several different angles. These squares can also be used to scribe lines on lumber, lay out rafters or even establish plumb if you pair it with a plumb bob.
Combination Squares
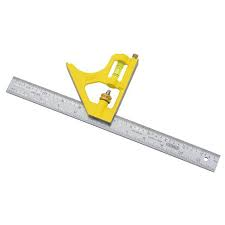
Used for laying out 90 and 45 angles, straight edges, as a marking gauge, to plumb and level, and depth gauge.
Sliding T Bevels
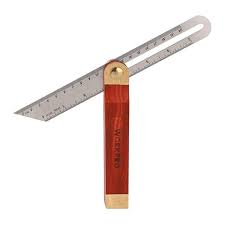
Used for transferring angles. There are no graduations on this tool. If a specific angle is desired, the sliding T bevel must be set using a protractor or a fixed angle tool.
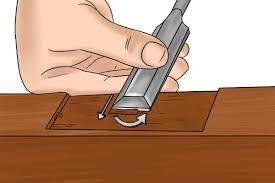
Utility Knife
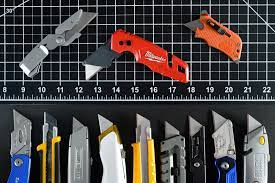
The knife is almost an indispensable tool to a carpenter. It is used for sharpening pencils, scoring lines, and cutting material. There are many styles and types of knives but only the utility knife will be covered here.
The utility knife has many configurations, some with a retractable blade, others with extendible snap-off blades. The main distinguishing feature is that the blade is replaceable and is set in a plastic or metal handle.
Scoring is a process of marking wood with the blade of a knife. The two functions it serves are to lay out guidelines and to cut the surface grain of the wood to prevent unsightly splitting when the board is cut with a saw.
When using a knife the following safety rules should always be considered:
- Only use a sharp knife. Dull tools require more effort to use which means a decrease in the control of the tool.
- When cutting, always cut away from your body.
- When a knife is not in use, close the blade or keep it sheathed.
Hand Saws

Even in this age of mechanization, certain cuts can only be made by hand, and handsaws are an irreplaceable necessity in any workshop or on any construction site.
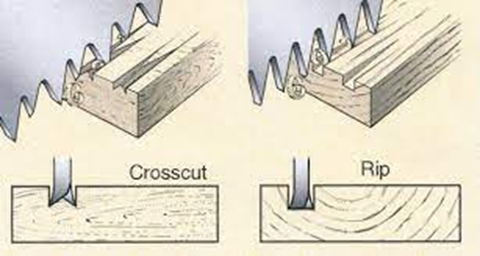
Handsaws are designed to meet the requirements of each specific type of cut to be made, and are broadly categorized as wood or metal cutting. Two more common types of woodcutting saws are the rip saw and the crosscut saw. Ripping is done along the grain, and crosscutting is done across the grain. Familiarize yourself with the different varieties of handsaws, and the cuts which they are designed to perform.
The “set” of the saw refers to alternate bending of the tip of each tooth. This makes the saw cut wider than the saw blade. The saw cut is also called the “kerf”.
Saw sizes are described in points, with the number of teeth being counted per inch. Size would be number of teeth less one.
When purchasing handsaws, ensure that the handle is placed comfortably, allowing the wrist to assume a natural position. Buy saws of good quality. Protect your investment by cleaning them after use, keeping the teeth sharp and correctly set, and protecting them during transportation and storage.
A sharp handsaw blade will have a bristly feel to it, and will catch in cloth when it is passed over it. It will cut quite easily through the material, taking very little effort to produce a notable result. As the blade becomes duller, it will take more and more energy to complete the same cut. A dull blade will have rounded edges on the teeth, and cloth will pass over it without catching.
Safety and Procedures
- Wear safety glasses, and/or a face shield, when using saws of any kind.
- Before starting a cut, inspect wood for nails, staples, and loose knots, which may damage the teeth or buckle the saw blade.
- Firmly hold the material being cut by fixing it in a vice, or clamping it to a workbench or sawhorse.
- Do not use your knee as a sawhorse.

To Use a Handsaw

- Start the cut by placing the thumb of your subordinate hand next to the mark for the cut.
- With your dominant hand on the saw handle, position the saw against the thumb, aligning the teeth onto the mark.
- Move the thumb upward on the blade, so that it clears the teeth. Pull slowly upward to start the cut, with slight downward pressure to keep the blade from jumping.
- When the teeth bite, push downward to complete the first cut. Release pressure into the material for the upward stroke, as the saw cuts only on the downward stroke.
Other Common Types of Handsaws
Hack Saw
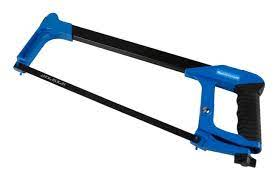
- One of the more useful tools in shop or field, it’s best used for cutting metal.
- Consisting of a thin metal blade from 6 – 12” in length and about a half inch in width, it is mainly used for cutting to length.
- The blades for hacksaws generally come in tool steel, high speed steel, or alloy steel. Depending on the class of work to be done, you would consider the length of blade, hardness of metal, as well as other factors when choosing a hacksaw blade.
- The set of a blade is the amount of cutting teeth that returned to one side, from center, and the pattern used in turning the teeth. Standard blades are regular alternate set; that is, one tooth is turned to the right, and the next is turned to the left. Another finer toothed set is called double alternate set, meaning two teeth are turned alternately. A third is called the wave set, also used in finer tooth blades.
- Selection of blades must always consider the metal to cut. A fine toothed blade on thick soft metal will become clogged with the softer material, and a large tooth blade will bind or possibly break off.
- The cutting stroke is on the forward stroke at a reasonable rate of speed as friction will sometimes cause the blade to stretch, causing you to decrease the tension on the blade assembly. Cutting as close as possible to where your piece is clamped will reduce chatter and vibration on the workpiece.
- A blade referred to as a close cut clipper is used for cutting smooth against a concrete wall, while center cut blades are used for general purpose work.
Back Saw
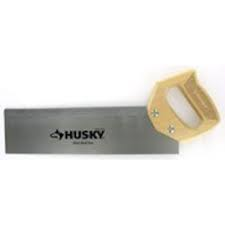
- What sets the backsaw apart is the reinforced back which adds to its accuracy.
- They come in different lengths and work best with a special frame for making bevel, mitre, and cross cuts. Free hand cuts are also possible where the blade isn’t required to pass completely through the stock.
- Operation is basically the same, always remembering to cut on the waste side. For duplicate lengths, use a stop set at the desired length. Use long, even, cutting strokes keeping the blade moving smoothly through the guides. And last but not least, always secure your work or mitering device.
Screwdrivers
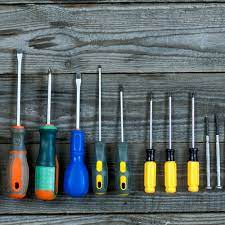
Many different shapes and sizes of screwdrivers exist to perform their tasks in different situations. There are also a number of different screwdriver tips that fit the various types of screw heads. Slot-head, Phillips, Robertson, and Allen tips are examples of these tip types. Within these different categories, there are several sizes, usually numbered. Be sure that you are buying the right screw for the job, and that you have the right screwdriver with which to apply those screws. The Robertson screwdriver comes in color coded sizes which are: yellow (0), green (1), red (2), and black (3).
Because of their instability during entry into the material and the susceptibility of the slot to damage by the screwdriver, slot-headed screws are becoming obsolete. Phillips gives a better grip, Robertson is more positive, and the six-sided Allen slot is best.
Replace screwdrivers when the tips wear and no longer efficiently engage the screw. When buying screwdrivers, remember that handles of rectangular cross-section are more efficient and less tiring to use.
Handles should be made of insulating, non-conductive materials, such as plastic or rubber, especially when working around electrical equipment. Note that handles with cushioned grips do not necessarily have insulating qualities. Insulated handles safe for electrical applications will have markings identifying them as such.
Safety and Procedures
- Safety glasses or a face shield should be worn when using a screwdriver.
- Pre-drilling proper pilot holes allow the use of only enough downward pressure to hold the tip into the screw. The screw will pull itself into the hole.
- When starting the screw, keep the screw positioned straight down the hole, with the screwdriver in line above it. A poorly positioned screw may fall over when you apply pressure, potentially resulting in injury.
- Do not attempt to hand-hold objects being screwed. If the work is unstable, use a vise, or clamp it to a workbench.
- It is unwise to walk around with a screwdriver in your pocket.
- Screws are tempered, and usually quite brittle. For this reason, hammering a screw could result in the head breaking off. A screw head in this situation can be classed as a volatile projectile. Do not attempt to hammer a screw into place!
- Screwdrivers are designed for driving screws only. Use pry bars for prying, scrapers for scraping, punches for punching, chisels for chiseling, stir sticks to stir paint, etc.
- Keep screwdrivers clean. Greasy, slippery handles can be dangerous.
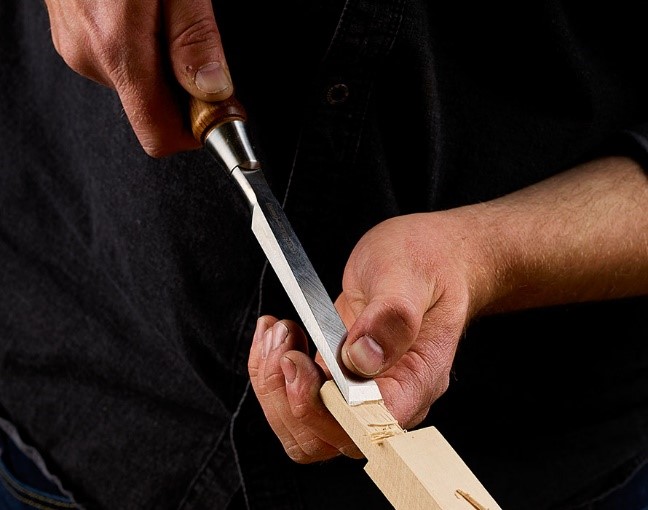
Wood Chisels
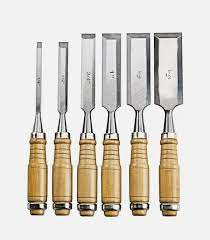
Like all other hand tools, wood chisels are made in a variety of shapes and sizes in order to fulfill the wide array of cutting requirements. It is important that you learn these differences, so that you can use the correct chisel for the job.
When purchasing chisels, be sure that the handles have no sharp edges and show no potential for splintering. The handle must hold the blade securely.
Safety and Procedures
When using chisels, it is recommended to wear safety glasses and/or a face shield.
Wood chisels are meant for cutting wood only. Because their blades are made of tempered steel, and are therefore quite brittle, they tend to break and chip rather easily, especially at the thin cutting edge. Do not attempt to cut metal, use them as a wedge, pry bar, putty knife, or for driving screws.
Never use a dull chisel. Chisels should be sharpened as often as necessary. You must know how to correctly sharpen your chisels and keep the necessary sharpening stones and honing lubricant on hand. By not taking the time to properly sharpen a chisel, you sacrifice both accuracy and safety. Frustration and injury could result.
If possible, use a whetstone or oilstone when sharpening, as a grinder will heat the tip, causing the metal to harden and develop micro cracks. If you must use a high-speed grinder to remove large nicks, be careful not to overheat the thin cutting edge. Cool the tip often in a container of water or, to avoid the possibility of cracking and rusting, let the blade air cool for several minutes between each few seconds of grinding. Complete the sharpening process on a whetstone or oilstone.
Check the material to be cut for nails, screws, staples, knots, and anything
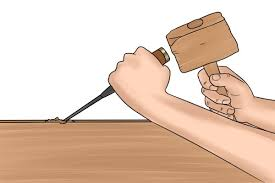
Clamp the material in a vise or onto a surface before working. If the chisel can’t be pushed through the material by hand, do not pound the end of the handle with your fist. Use a suitable mallet with a broad plastic or wooden face. Do not strike wood chisels with metal hammers, because the hard face of the hammerhead may fracture the handle of the chisel, creating dangerous flying particles.
Hold the blade of the chisel firmly in your subordinate hand, stabilizing the cut. The dominant hand holds the handle, and forces the chisel into the cut.
If it is necessary to use a mallet, grasp the chisel firmly by the handle, using your subordinate hand. Cut with the chisel pointed away from yourself, with your hands and body away from the cutting edge. Watch the cutting tip, not the handle, when striking it with a mallet.
When finished with the chisel, store it in a clean, dry rack, box, or roll-up fabric pouch made for the purpose. It is also advisable to use plastic end caps, which protect the cutting edge from damage, as well as offering safety protection. If a chisel handle develops splinters or cracks, do not use the tool until it is replaced. Any chisel that is cracked, chipped, badly dented, bent, or otherwise shows signs of excessive wear, should be replaced immediately.
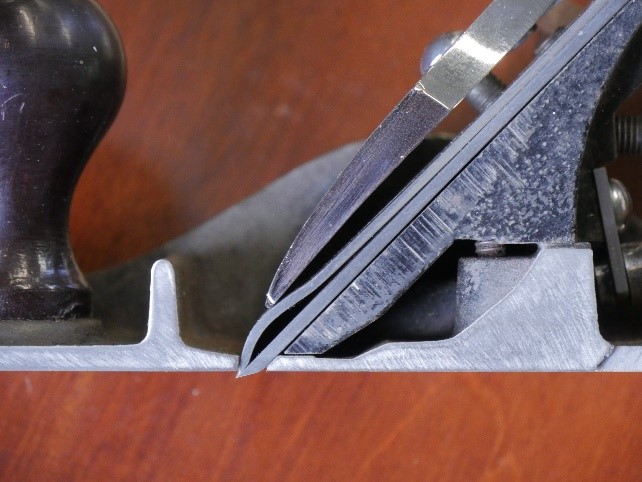
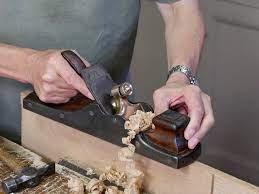
Hand Planes
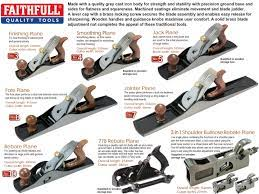
Hand planes consist essentially of a wood chisel, held in a box, which controls the cutting angle and the depth of cut.
Like all other hand tools, hand planes are made in a variety of shapes and sizes. It is important that you learn these variances, so that you can use the correct plane for the job.
When purchasing hand planes, be sure that the handles have no sharp edges and show no potential for splintering. The body casting must be sound, and the sole perfectly flat and unmarred.
Safety and Procedures
- When using hand planes, it is recommended to wear safety glasses and/or a face shield.
- Hand planes are meant for cutting wood only. Because their blades are made of tempered steel, and are therefore quite brittle, they tend to break and chip rather easily, especially at the thin cutting edge.
- Never use a dull plane. Blades should be sharpened as soon as they show signs of scraping, chipping, or gouging. You must know how to correctly sharpen your blades, and keep the necessary sharpening stones and honing lubricant on hand. By not taking the time to properly sharpen a plane, you sacrifice both accuracy and safety.
- Check the material to be cut for nails, screws, staples, knots, and anything else which may impede your work, damage the tool, or create a safety hazard.
- The material to be planed must be held securely. Clamp it in a vise or onto a surface before working. When possible plane with the grain.
Hand planes are usually designed so that they can be laid on their side when not in use, so that the cutter is not resting on the workbench surface. This can be a danger, as the cutter is fully exposed in this position. A special stand should be built which fits the tool, and supports its weight on the sole, leaving the cutter off of the workbench surface. This will protect the cutting edge from damage, as well as offering safety protection.
When finished with the hand plane, store it in a clean, dry, rack or box, which supports its sole as described above.
If a plane handle develops splinters or cracks, do not use the tool until it is replaced. A body casting that is cracked, chipped, badly dented, bent, or otherwise shows signs of excessive wear, should be replaced immediately.