126
Lesson 2: Using Software
Learning Objectives:
- Analyze the functionalities and applications of key technology tools like CityWorks, StarProgramming, EnerGov, Tenant Cloud, and Innago.
- Demonstrate proficiency in Microsoft tools: Outlook, Word, Excel, and PowerPoint.
- Evaluate and select the most suitable software for your role as a public works or housing manager.
- Classify and explain the purposes of essential software for management, monitoring, and reporting.
Introduction
Software and technology can help you be much more efficient at your job. It is also something that can be daunting, anxiety causing, and frustrating. In this lesson, you will improve your skill with common Microsoft office tools to a point where you can use the software confidently and quickly. Just like any tool though, the more you use a tool the easier it gets. I know how to use a hammer in theory, but it takes me 10 minutes (and three bent nails) to successfully sink a nail!
There are also software tools that make managing infrastructure easier. We will have a look at some of the options, and you can assess and evaluate the type of tool that may be useful for your community.
Office tools training
There are now a couple of options when it comes to managing and being productive in the office. Primarily, there is the Microsoft suite of products (collectively called Microsoft Office) which are all available online (Microsoft365). This course will focus on Microsoft products.
Alternatively, Google has made excellent inroads into the office productivity space. Google offers office productivity tools (word processor, spreadsheet, presentation software) that are in some ways better than the Microsoft suite of products. They, however, are not the standard in the professional office. You can view information about the G Suite (sometimes called Google Workspace) of products here:
https://workspace.google.com/intl/en_ca/
Cloud Computing
There has been a massive change in computers over the past 6 years (at time of writing, 2023). Before, software (programs) had to be run and stored directly on your computer. There was no need for the internet to run these programs. With the advent of cloud computing (more on this later), both the programs themselves as well as your data (documents, email, spreadsheets) are all stored “in the cloud.” This means very little needs to be stored on your computer, but you need an internet connection to do almost anything.
Watch the following video for further explanation of “the cloud.”
https://edu.gcfglobal.org/en/computerbasics/understanding-the-cloud/1/
Microsoft Office programs can be either run online, or on from your computer directly. There are advantages and disadvantages to both.
In the following sections you will be directed to an external training website for tutorials on Microsoft products. Create an account on this website so you can save your progress and report your results to your instructor. Here is how.
- Proceed to the website https://edu.gcfglobal.org/en/
- Click Join for Free

- Sign up using your Facebook, or Google account. (You can use your personal accounts for this if you like). Or, sign up using your email (SIIT email is ok!) Be sure to click “I accept the Terms of Service…”
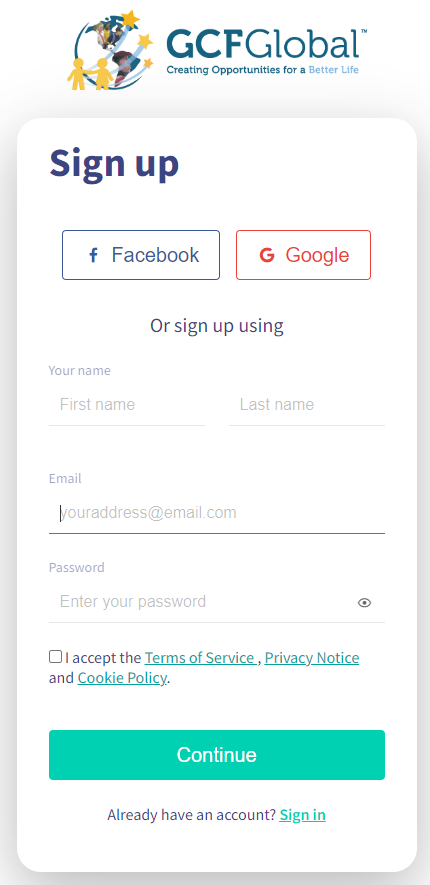
- If you use an email sign in, you will be sent an email with instructions on how to verify your account. Follow the instructions in the email.
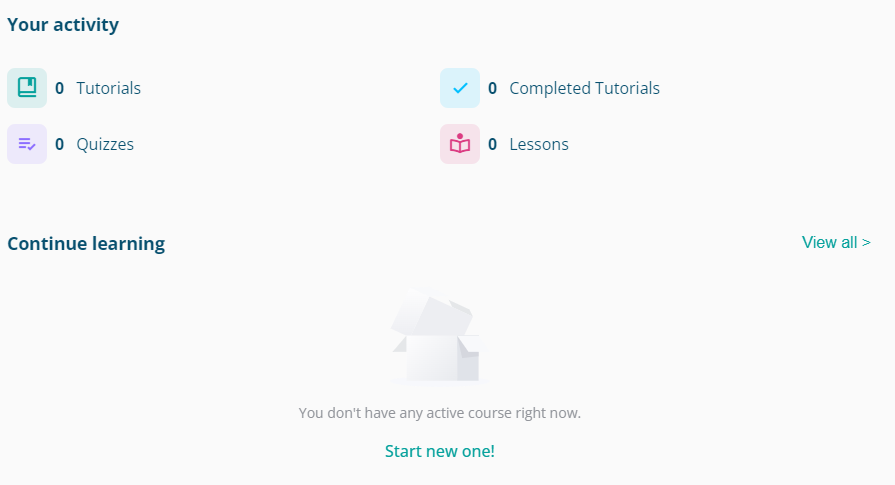
- Once logged in, click to start a new tutorial:
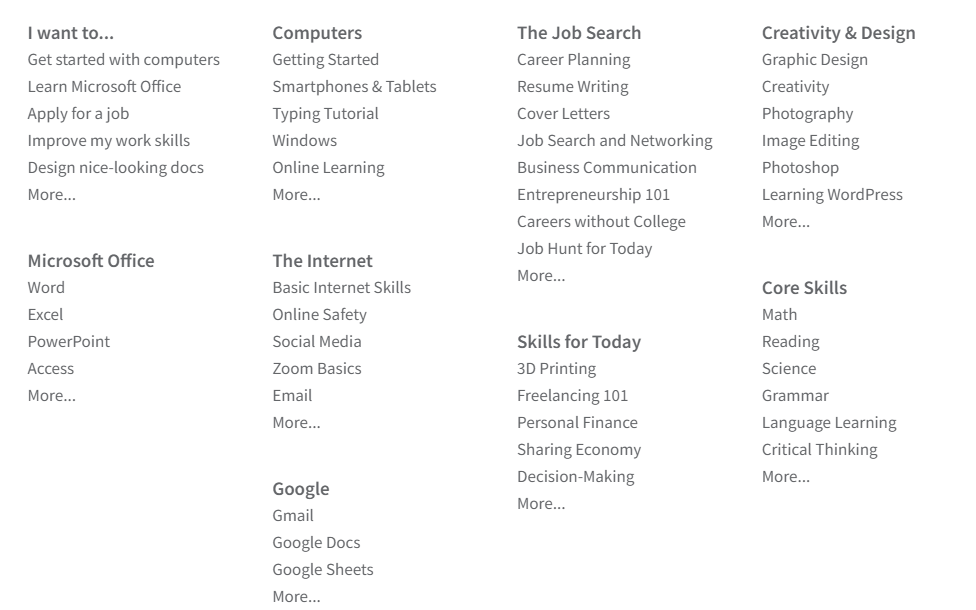
- Select the TOPICS menu option

- There may be many courses you want to take- they are all excellent and all free. However, for now, under Microsoft Office, select Word
Outlook
Outlook is Microsoft’s email tool, however there are many email tools available. If you have an iPhone, you would be familiar with Mail, apple’s mail tool. If you have an Android phone, you would likely be familiar with Gmail. The important thing to note is that all these are just tools to access email. For example, if you have a Yahoo account, or a Gmail account, or an SIIT account, all these account emails can be displayed in Outlook.
Access the following tutorial:
https://edu.gcfglobal.org/en/outlook2010/
Complete lessons 1-6
Lesson 1: Getting to Know Outlook 2010. Complete the challenge at the end of the lesson. Ensure your SIIT email and any personal email (gmail) is set up in Outlook.
Lesson 2: Sending and Receiving Email. Complete the challenge at the end of the lesson. Send an email to your instructor from outlook. Printing the email is optional.
Lesson 3: Organizing and Managing Email. Optional. You may want to revisit this lesson when you get more email in your inbox.
Lesson 4: Managing Contacts. Optional.
Lesson 5: Managing Calendars. Complete the challenge questions at the end of the lesson. Create a calendar meeting and invite your instructor.
Lesson 6: Collaborating with Calendars.
Lessons 1-6 outcomes and assessment checklist:
<note to developer: these may be revised as assignment submissions in Brightspace so the instructor can see everything on D2L. Assessment should just be based on completion.>
Lesson 2: email from student from Outlook client.
Lesson 6: calendar invite from the student.
Microsoft Word
Microsoft word is a word processor. This is a tool that allows you to create and edit documents such as contracts, rental agreements, or memos. It is one of the most useful tools in an office environment.
After following the steps in the previous section, click to start the tutorial “Word” as below:
https://edu.gcfglobal.org/en/word/
Complete lessons 1 – 30 and Lesson 36
Lesson 1: Complete the Challenge at the end of the lesson. No submission is required for this.
Lesson 2: Create a OneDrive account that you can use after this program is completed. If you already have a Microsoft account, you can skip this step. No submission is required.
Lesson 3: Opening a document. Complete the Challenge at the end of the lesson. No submission is required.
Lesson 4: Save and share a document. Complete the Challenge at the end of the lesson. Send a link to your document to your instructor. Send a PDF copy of your document via email attachment to your instructor. (If you are uncertain how to create an email with attachment, that’s ok. We will cover it in the “Outlook” section.)
Lesson 5: Text Basics. In this lesson, pay particular attention to the keyboard shortcuts using the control ctrl) button on your keyboard. Download the practice document and perform the online challenge. Share a link to your modified file with your instructor.
Lesson 6: Formatting text. In this lesson, pay particular attention to the keyboard shortcuts using the control ctrl) button on your keyboard. Download the practice document and perform the online challenge. Share a link to your modified file with your instructor.
Lesson 7: Find and Replace. Download the practice document and perform the online challenge. Share a link to your modified file with your instructor.
Lesson 8: Indents and Tabs. Download the practice document and perform the online challenge. Share a link to your modified file with your instructor.
Lesson 9: Line and Paragraph Spacing. Download the practice document and perform the online challenge. Share a link to your modified file with your instructor.
Lesson 10: Lists. Download the practice document and perform the online challenge. Share a link to your modified file with your instructor.
Lesson 11: Links. Optional, not required.
Lesson 12: Page Layout. Download the practice document and perform the online challenge. Share a link to your modified file with your instructor.
Lesson 13: Printing Documents. Complete the Challenge at the end of the lesson. No submission is required.
Lesson 14: Breaks. Download the practice document and perform the online challenge. Share a link to your modified file with your instructor.
Lesson 15: Columns. Download the practice document and perform the online challenge. Share a link to your modified file with your instructor.
Lesson 16: Headers and Footers. Download the practice document and perform the online challenge. Share a link to your modified file with your instructor.
Lesson 17: Page Numbers. Download the practice document and perform the online challenge. Share a link to your modified file with your instructor.
Lesson 18: Pictures and Text Wrapping. Download the practice document and perform the online challenge. Share a link to your modified file with your instructor.
Lesson 19: Formatting Pictures: Download the practice document and perform the online challenge. Share a link to your modified file with your instructor.
Lesson 20: Shapes. Optional. No submission required.
Lesson 21: Text Boxes. Optional. No submission required.
Lesson 22: Aligning, Ordering, and Grouping Objects. Optional. No submission required.
Lesson 23: Tables. Download the practice document and perform the online challenge. Share a link to your modified file with your instructor.
Lesson 24: Charts. Download the practice document and perform the online challenge. Share a link to your modified file with your instructor.
Lesson 25: Checking spelling and grammar. Download the practice document and perform the online challenge. Share a link to your modified file with your instructor.
Lesson 26: Track Changes and Comments. Optional. No submission required.
Lesson 27: Inspecting and protecting Documents. Optional. No submission required.
Lesson 28: SmartArt Graphics. Optional. No submission required.
Lesson 29: Applying and Modifying Styles. Download the practice document and perform the online challenge. Share a link to your modified file with your instructor.
Lesson 30: Mail Merge. Optional. No submission required.
Lesson 36: Quiz. Note, if you did not do all of the lessons (including optional or not required) you might not know everything on the quiz. The quiz is just a reflection of your own learning. You can go back and review whichever lessons you like and retake the quiz.
Lessons 1-30 outcomes and assessment checklist:
<note to developer: these may be revised as assignment submissions in Brightspace so the instructor can see everything on D2L. Assessment should just be based on completion.>
- Lesson 4 shared link and emailed PDF attachment.
- Lesson 5 shared link to modified file.
- Lesson 6 shared link to modified file.
- Lesson 7 shared link to modified file.
- Lesson 8 shared link to modified file.
- Lesson 9 shared link to modified file.
- Lesson 10 shared link to modified file.
- Lesson 12 shared link to modified file.
- Lesson 14 shared link to modified file.
- Lesson 15 shared link to modified file.
- Lesson 16 shared link to modified file.
- Lesson 17 shared link to modified file.
- Lesson 18 shared link to modified file
- Lesson 19 shared link to modified file
- Lesson 23 shared link to modified file
- Lesson 24 shared link to modified file
- Lesson 25 shared link to modified file
- Lesson 29 shared link to modified file
- Lesson 36 completed quiz. Note- students will not be able to answer every question on the quiz because not all lessons were required, and some were optional. The quiz is just for a student’s reflection of their own learning.
Excel
Excel is a spreadsheet. This is a very useful tool for planning financial things. Data (numbers or words) can be stored in organized cells. Calculations can be automatically performed on numbers in a spreadsheet.
Excel is an incredibly full featured tool. Below are lessons that cover the basics, but there is SO much more. If you are already comfortable with the basics, feel free to take all the optional lessons in the online tutorial to become an excel super user!
Exercises
Access the Excel tutorial here:
https://edu.gcfglobal.org/en/excel/
Complete the following lessons and submit the required documents to the instructor.
Lesson 1: Introduction. Complete the Challenge at the end of the lesson. No submission is required.
Lesson 2: Understanding OneDrive. No submission is required.
Lesson 3: Creating and opening workbooks. No submission is required.
Lesson 4: Saving and Sharing Workbooks. Download the practice document and perform the challenge at the end of the lesson. Share a link to your modified file with your instructor.
Lesson 5: Cell Basics. Download the practice document and perform the challenge at the end of the lesson. Share a link to your modified file with your instructor.
Lesson 6: Modifying Columns, Rows, and Cells. Download the practice document and perform the challenge at the end of the lesson. Share a link to your modified file with your instructor.
Lesson 7: Formatting Cells. Download the practice document and perform the challenge at the end of the lesson. Share a link to your modified file with your instructor.
Lesson 8: Number formats. Optional. No submission required.
Lesson 9: Working with multiple worksheets. Download the practice document and perform the challenge at the end of the lesson. Share a link to your modified file with your instructor.
Lesson 10: Using find and replace. Optional. No submission required.
Lesson 11: Checking spelling. Optional. No submission required.
Lesson 12: Page layout and printing. Complete the Challenge at the end of the lesson. No submission is required.
Lesson 13: Intro to formulas. This lesson introduces formulas which is a foundational concept when learning spreadsheets. Download the practice document and perform the challenge at the end of the lesson. Share a link to your modified file with your instructor. <note to instructor: this lesson involves some mathematical concepts and may be confusing for some students. This would be a good lesson to do online with students.>
Lesson 14: Creating More Complex Formulas. Download the practice document and perform the challenge at the end of the lesson. Share a link to your modified file with your instructor. <note to instructor: this lesson involves some mathematical concepts and may be confusing for some students. This would be a good lesson to do online with students.>
Lesson 15: Relative and Absolute Cell References. Download the practice document and perform the challenge at the end of the lesson. Share a link to your modified file with your instructor.
Lesson 16: Functions. Download the practice document and perform the challenge at the end of the lesson. Share a link to your modified file with your instructor. <note to instructor: this lesson involves some mathematical concepts and may be confusing for some students. This would be a good lesson to do online with students.>
Lesson 17: Basic Tips for Working with Data. Optional. No submission required.
Lesson 18: Freezing Panes and View Options. Optional. No submission required.
Lesson 19: Sorting Data. Optional. No submission required.
Lesson 20: Filtering Data. Optional. No submission required.
Lesson 21: Groups and Subtotals. Optional. No submission required.
Lesson 22: Tables. Optional. No submission required.
Lesson 23: Charts. Creating charts from data in a spreadsheet is an essential skill that you will use to present data in a convincing proposal, discover a trends, or make a decisions. Download the practice document and perform the challenge at the end of the lesson. Share a link to your modified file with your instructor.
Lesson 24: Conditional Formatting. Optional. No submission required.
Lesson 25: Comments and Co-authoring. This lesson talks about how you can collaborate on spreadsheets remotely. This is an important feature, for example, in a course like this where everyone is in different locations. Download the practice document and perform the challenge at the end of the lesson. In this lesson, collaborate with a fellow student. Also, send your completed result to your instructor.
Lesson 26: Inspecting and protecting workbooks. Optional. No submission required.
Lesson 27: Intro to PivotTables. Optional. No submission required.
Lesson 28: Doing More with PivotTables. Optional. No submission required.
Lesson 29: What-if Analysis. Optional. No submission required.
Lesson 36: Quiz. Note, if you did not do all of the lessons, you will not be able to answer all the questions in the quiz. The quiz is optional and can be a good reflection of your own learning. The mark will not be recorded.
<note to developer: these may be revised as assignment submissions in Brightspace so the instructor can see everything on D2L. Assessment should just be based on completion.>
- Lesson 4 shared link and emailed PDF attachment.
- Lesson 5 shared link to modified file.
- Lesson 6 shared link to modified file.
- Lesson 7 shared link to modified file.
- Lesson 9 shared link to modified file.
- Lesson 13 shared link to modified file.
- Lesson 14 shared link to modified file.
- Lesson 15 shared link to modified file.
- Lesson 16 shared link to modified file
- Lesson 23 shared link to modified file
- Lesson 25 shared link and collaboration with another student. Shared link to a modified file.
- Lesson 36 completed quiz. Note- students will not be able to answer every question on the quiz because not all lessons were required, and some were optional. The quiz is just for a student’s reflection of their own learning.
Power Point
PowerPoint is a presentation software. It allows you to create slides that you can display to a group of people with a projector. It has a number of features to assist you in creating good looking presentations very easily.
Access the PowerPoint tutorial here:
https://edu.gcfglobal.org/en/powerpoint/
Go through the following lessons, and submit the assignments to your instructor as indicated. The lessons that have been omitted either cover material that is very similar to that in a previous tutorial, or are not necessary for basic every-day use of Power Point. As always, if time permits and you are interested, please do all the lessons and be a PowerPoint super user!
Lesson 1: Getting Started with PowerPoint. Complete the Challenge at the end of the lesson and share a link to your file with your instructor.
Lesson 2: Understanding OneDrive. No submission required.
Lesson 3: Creating and Opening Presentations. No submission required.
Lesson 4: Saving Presentations. Share a link to the PDF file you have created with your instructor.
Lesson 5: Slide Basics. Download the practice document and perform the challenge at the end of the lesson. Share a link to the modified file with your instructor.
Lesson 6: Text Basics. Download the practice document and perform the challenge at the end of the lesson. Share a link to the modified file with your instructor.
Lesson 7: Applying Themes. Download the practice document and perform the challenge at the end of the lesson. Share a link to the modified file with your instructor.
Lesson 8: Applying Transitions. Download the practice document and perform the challenge at the end of the lesson. Share a link to the modified file with your instructor.
Lesson 9: Managing Slides. Download the practice document and perform the challenge at the end of the lesson. Share a link to the modified file with your instructor.
Lesson 10: Using Find and Replace. Optional.
Lesson 11: Printing. Optional.
Lesson 12: Presenting your Slide Show. Download the practice presentation and present your slide show using virtual classroom to a fellow student. Your instructor can help you by setting up a virtual classroom and creating breakout room.
<Note to instructor: this exercise can be done in a virtual synchronous class by creating breakout rooms and allowing pairs of students to present to one another.>
Lesson 13: Lists. Optional.
Lesson 14: Indents and Line Spacing. Optional.
Lesson 15: Inserting Pictures. Optional.
Lesson 16: Formatting Pictures. Optional.
Lesson 17: Shapes. Optional.
Lesson 18: Aligning, Ordering, and Grouping Objects. Download the practice document and perform the challenge at the end of the lesson. Share a link to the modified file with your instructor.
Lesson 19: Animating Texts and Objects. Optional.
Lesson 20: Inserting Videos. Optional.
Lesson 21: Inserting Audio. Optional.
Lesson 22: Tables. Optional.
Lesson 23: Charts. Optional.
Lesson 24: SmartArt Graphics. Download the practice document and perform the challenge at the end of the lesson. Share a link to the modified file with your instructor.
Lesson 25: Checking Spelling and Grammar. Optional.
Lesson 26: Reviewing Presentations. Create a presentation and share it with a fellow student and your instructor. Have the other student comment on your presentation. Comment on the fellow student’s presentation.
Lesson 27: Inspecting and Protecting Presentations. Optional.
Lesson 28: Modifying Themes. Optional.
Lesson 29: Slide Master View. Optional.
Lesson 30: Links. Optional.
Lesson 31: Action Buttons. Optional.
Lesson 32: Rehearsing and Recording your Presentation. Optional.
Lesson 33: Sharing your Presentation Online. Download the practice presentation and share it online with a fellow student.
Lesson 38: Working with Icons. Optional
Lesson 39: Quiz. Note, if you did not do all of the lessons, you will not be able to answer all the questions in the quiz. The quiz is optional and can be a good reflection of your own learning. The mark will not be recorded.
Lesson assignments assessment and checklist
<note to developer: these may be revised as assignment submissions in Brightspace so the instructor can see everything on D2L. Assessment should just be based on completion.>
Lesson 1: shared link to modified file.
Lesson 4: shared pdf file
Lesson 5: shared link to modified file.
Lesson 6: shared link to modified file.
Lesson 7: shared link to modified file.
Lesson 8: shared link to modified file.
Lesson 9: shared link to modified file.
Lesson 12: participation in the pair presentation activity
Lesson 18: shared link to modified file.
Lesson 24: shared link to modified file.
Lesson 26: shared link to modified file. Assessment is based on the student’s comments on the presentation.
Lesson 33: Student shares presentation online with a fellow student. Mutual assessment between the pair of students.
Lesson 39: completed quiz. Note- students will not be able to answer every question on the quiz because not all lessons were required, and some were optional. The quiz is just for a student’s reflection of their own learning.
Purpose and Benefit of Management Software
Management software plays a crucial role in enhancing the efficiency, effectiveness, and overall management of public works and housing operations. In the realm of public works and housing management, where a myriad of tasks and responsibilities need to be coordinated, software solutions offer a range of advantages. Let’s delve into the purpose and benefits of using management software in this context:
Purpose:
- Streamline Operations
Public works and housing management involve a multitude of tasks, such as maintenance of infrastructure, property management, asset tracking, project planning, and more. Management software provides a centralized platform to streamline these operations, allowing for seamless coordination and improved resource allocation. - Enhance Communication
Effective communication is crucial in public works and housing management, involving various stakeholders such as residents, contractors, government agencies, and internal teams. Management software facilitates communication through messaging, notifications, and document sharing, ensuring that everyone is well-informed and engaged. - Data Management
Public works and housing management generate vast amounts of data related to assets, projects, budgets, and maintenance schedules. Management software offers a structured way to capture, store, and analyze this data, enabling data-driven decision-making and informed planning. - Asset Tracking
Managing and maintaining public assets, such as roads, bridges, utilities, and housing facilities, is a complex task. Software solutions provide tools for tracking assets’ condition, maintenance history, and performance metrics, ensuring optimal utilization and prolonging their lifespan. - Project Planning
Effective planning is essential for executing public works projects and housing developments. Management software aids in project planning, resource allocation, scheduling, and tracking milestones, enabling efficient project execution and timely completion.
Benefits:
- Efficiency Gains
Management software automates routine tasks, reduces manual paperwork, and minimizes administrative overhead. This leads to significant time savings, allowing staff to focus on strategic planning and high-value activities. - Improved Collaboration
With centralized software, teams across different departments or locations can collaborate seamlessly. Real-time access to information fosters collaboration, reduces silos, and enhances cross-functional teamwork. - Data-Driven Decision-Making
Software solutions offer data analytics and reporting capabilities, enabling managers to make informed decisions based on accurate insights. This leads to more effective resource allocation, improved budgeting, and better project prioritization. - Enhanced Accountability
Management software tracks tasks, projects, and responsibilities, fostering accountability among team members. Assigning and monitoring tasks becomes more transparent, reducing the likelihood of missed deadlines or oversights. - Cost Savings
By optimizing maintenance schedules, asset utilization, and resource allocation, management software contributes to cost savings. Preventive maintenance and efficient resource management reduce operational expenses over time. - Regulatory Compliance
Public works and housing operations often need to adhere to regulatory standards and compliance requirements. Management software helps track and manage compliance-related tasks, reducing the risk of penalties or legal issues. - Improved Citizen Engagement
For housing management, software solutions may offer resident portals where tenants can submit requests, view announcements, and communicate with property managers. This fosters better engagement and satisfaction among residents. - Transparency and Accountability
Transparency is vital in public works and housing management, where citizens and stakeholders expect visibility into projects, budgets, and services. Management software provides transparency by enabling easy access to information and updates.
In conclusion, management software in public works and housing management serves the purpose of streamlining operations, enhancing communication, managing data, and optimizing asset management. The benefits include efficiency gains, improved collaboration, data-driven decision-making, cost savings, and enhanced accountability. By leveraging these software solutions, organizations can effectively manage their resources, projects, and assets while providing better services to citizens and stakeholders.
Software Evaluation
Introduction
Selecting the right software for your organization is a critical decision that can have far-reaching implications. The software you choose will impact productivity, efficiency, and overall business success. To ensure that you make an informed decision, it’s essential to follow a structured software evaluation method. In this article, we’ll explore various software evaluation methods, their benefits, and how to apply them effectively.
Understanding Software Evaluation
Software evaluation is the systematic process of assessing and comparing different software solutions to determine which one best aligns with an organization’s needs, requirements, and goals. It involves a combination of technical analysis, user feedback, and strategic considerations.
Common Software Evaluation Methods
Checklist-Based Evaluation:
Checklist-based software evaluation is a structured approach that involves creating a checklist of predefined criteria and features that a software solution must possess. Each software option is then assessed against these criteria, and a score is assigned based on whether the criteria are met or not. This method provides a clear and systematic way to compare multiple software solutions and determine which one aligns best with the organization’s needs. Let’s delve deeper into the process and benefits of checklist-based software evaluation.
The process is as follows:
- Define Evaluation Criteria
Start by identifying the criteria that are essential for your organization. These criteria could include technical specifications, required functionalities, compatibility with existing systems, security features, scalability, user interface, and more. - Create a Checklist
Develop a checklist that outlines each criterion and its corresponding features or specifications. Each item on the checklist should be clear, specific, and measurable. - Score Each Software
Evaluate each software solution against the checklist. Assign a score to each criterion based on whether the software meets the requirement, partially meets it, or doesn’t meet it at all. You can use a scoring system, such as 1 to 5, to indicate the level of compliance. - Calculate Total Scores
Calculate the total score for each software by summing up the scores assigned to individual criteria. This will provide a quantitative comparison of how well each software aligns with your organization’s needs. - Compare and Analyze
Compare the total scores of different software solutions. The software with the highest total score is likely the one that best meets your organization’s requirements.
Weighted Scoring Model:
The weighted scoring model involves assigning weights to different evaluation criteria based on their relative importance. These criteria can encompass technical features, functionalities, cost, scalability, user experience, support, and more. Each criterion is assigned a weight that represents its significance in the overall decision-making process.
The process is as follows:
- Identify Evaluation Criteria
Begin by identifying the criteria that are relevant to your organization’s needs. These criteria should cover various aspects of the software solution, including technical, functional, and non-functional attributes. - Assign Weights
Assign weights to each criterion to indicate its importance. The total sum of all weights should equal 100% to ensure a balanced evaluation. - Rate Software Solutions
Evaluate each software solution against the predefined criteria and rate them on a predefined scale, such as 1 to 5. This rating reflects how well each solution meets the specific criterion. - Calculate Weighted Scores
Multiply the rating of each criterion by its corresponding weight. This calculation yields the weighted score for each criterion. - Sum the Scores
Sum the weighted scores across all criteria for each software solution. The resulting total represents how well a particular solution aligns with the organization’s requirements. - Compare Solutions
Compare the total weighted scores of different software solutions. A higher total score indicates a stronger alignment with the organization’s needs.
This process considers the relevance of evaluation criteria. Some features are ‘nice to have’ and some are essential. With a simple checklist based evaluation, several ‘nice to have’ software features could outweigh one missing essential feature.
Proof of Concept (PoC):
A proof of concept is a practical demonstration of a software solution’s capabilities in a controlled environment. It involves implementing a small-scale version of the software to validate its functionality and assess its alignment with the organization’s needs. A POC aims to answer key questions regarding whether the software can deliver the desired results, integrate with existing systems, and meet performance expectations.
The following is the process:
- Identify Key Objectives
Clearly define the objectives and goals of the proof of concept. This includes specifying the functionality, performance benchmarks, and expected outcomes. - Select a Limited Scope
Focus on a specific module, feature, or aspect of the software to evaluate during the proof of concept. This ensures that the evaluation remains manageable and targeted. - Set Up the Environment
Create a controlled environment that mirrors the organization’s infrastructure. This allows for accurate assessment of the software’s behavior in a real-world context. - Implement the POC
Deploy the software solution in the selected environment and configure it according to the identified objectives. - Gather Data and Feedback
Monitor the software’s performance, collect data, and gather feedback from users and stakeholders. Evaluate how well the software addresses the identified objectives. - Analyze Results
Analyze the collected data and feedback to determine if the software meets the defined objectives. Assess performance, user experience, compatibility, and other relevant factors. - Decision-Making
Based on the analysis, make an informed decision about whether to proceed with the software implementation, invest in further development, or explore alternative solutions.
The proof of concept is a good way to experience the look and feel of the software. It also proves that certain features will work. It makes good sense to have a “proof of concept” after an initial checklist or weighted scoring model is employed. Often, software companies will develop a proof of concept on your data as a part of the sales process.
Cost-Benefit Analysis:
Cost-benefit analysis is a systematic method for evaluating the potential benefits and costs associated with a proposed project, investment, or decision. In the context of software evaluation, CBA quantifies the advantages of adopting a software solution and compares them to the associated costs, aiming to determine whether the benefits outweigh the expenses.
The process is as follows:
Identify Costs and Benefits: Begin by identifying and categorizing the costs and benefits associated with the software solution. Costs may include licensing fees, implementation expenses, training costs, and ongoing maintenance. Benefits can encompass increased productivity, reduced operational costs, improved efficiency, and enhanced customer satisfaction.
Quantify Costs and Benefits
Assign monetary values to both costs and benefits. This step involves estimating the financial impact of each element. For benefits, consider factors like time savings, and cost reductions. For costs, include direct and indirect expenses. Beware that software is rarely a one time purchase. It may be a subscription model, or there may be ongoing upgrade costs. Consider the computer hardware that will be required (and need to be updated over time.) Or perhaps the software is online only.
Time Horizon
Determine the time period over which the costs and benefits will be assessed. The time horizon can range from months to years, depending on the nature of the software and the organization’s goals.
Calculate Return on Investment (ROI)
ROI is a ratio that compares the net benefits to the total costs. It provides insights into the efficiency and profitability of the software investment.
Formula for Calculating ROI:
- ROI is calculated using a simple formula that compares the net profit or gain generated by an investment to its initial cost:
- ROI = (Net Profit / Initial Cost) × 100
- Net Profit: The total earnings generated by the investment minus the initial cost.
- Initial Cost: The amount of money initially invested in the project or initiative.
Steps to Calculate ROI:
- Determine Initial Cost: Identify the total amount of money invested at the beginning of the project. This includes all costs associated with the investment, such as purchase costs, implementation costs, and any other relevant expenses.
- Calculate Net Profit: Determine the total earnings or benefits generated by the investment. This can include increased revenue, cost savings, or other positive outcomes. Subtract any ongoing costs or expenses related to the investment from the total earnings.
- Apply ROI Formula: Divide the net profit by the initial cost and multiply by 100 to express the result as a percentage.
Interpreting ROI:
- The calculated ROI value provides insights into the profitability and efficiency of an investment:
- If ROI > 0: The investment is generating positive returns, indicating that it’s profitable.
- If ROI = 0: The investment is breaking even, with returns equal to the initial investment.
- If ROI < 0: The investment is resulting in negative returns, suggesting that it’s not generating profits.
Vendor Assessment:
In this method, the focus is on evaluating the software vendor’s reputation, support capabilities, and long-term viability. A reliable vendor can significantly impact the success of the software implementation.
In this type of assessment, testimonials and recommendations from other communities are key.
Benefits of Using Software Evaluation Methods
- Informed Decision-Making: By following a structured evaluation method, you gather comprehensive information about each software option, enabling you to make informed decisions.
- Alignment with Business Goals: The evaluation process helps ensure that the chosen software aligns with your organization’s strategic objectives and operational needs.
- Risk Mitigation: By thoroughly assessing each software’s features, security, and compatibility, you can identify potential risks and address them proactively.
- Cost Optimization: Effective evaluation helps avoid costly mistakes by selecting software that offers the right features at the right price.
Applying Software Evaluation Methods
- Define Requirements: Clearly outline your organization’s requirements, including technical, functional, and business needs.
- Select Evaluation Team: Assemble a cross-functional team that includes representatives from different departments to ensure a holistic evaluation.
- Identify Criteria: Determine the evaluation criteria that are most important for your organization. This could include features, compatibility, scalability, and support.
- Score and Compare: Evaluate each software solution against the defined criteria, assigning scores and weights as applicable.
- User Testing: Involve end-users in testing the software’s usability and functionality to gather valuable feedback. This can often be done as part of a proof of concept.
- Vendor Assessment: If applicable, assess the software vendors based on their reputation, customer reviews, and long-term viability.
- Cost Analysis: Evaluate the total cost of ownership, including initial costs, maintenance, and potential savings.
- Decision and Implementation: Based on the evaluation results, select the software that best meets your needs and proceed with implementation.
Conclusion
Choosing the right software requires a systematic approach that considers technical, functional, and strategic aspects. By employing effective software evaluation methods, organizations can make well-informed decisions that drive productivity, enhance efficiency, and contribute to overall success. Remember, software evaluation is not a one-size-fits-all process; tailor it to your organization’s unique needs for the best results.
References:
Al-Mudimigh, A. S., Zairi, M., & Al-Mashari, M. (2001). ERP software selection process in Saudi Arabia. Information Technology & People, 14(3), 225-237.
Bontchev, B., & Bontchev, R. (2016). Proof of concept: An evaluation and comparison framework for the software architecture of systems with performance requirements. International Journal of Information Management, 36(6), 945-954.
Chen, S. S., & Liu, Y. J. (2013). A hybrid multiple criteria decision making approach for information systems outsourcing. Journal of Computer Information Systems, 53(3), 48-56.
Chen, Y., Yen, D. C., & Rajkumar, T. M. (2008). The selection of open source software: A weighted scoring model. Decision Support Systems, 45(4), 926-934.
Chowdhury, S., & Kulkarni, U. R. (2017). A comprehensive checklist for evaluating software products for quality. In Advances in Computing and Data Sciences (pp. 229-237). Springer.
Dahanayake, A. (2018). Evaluating and Selecting Software Packages: A Checklist Approach. Information Systems Management, 35(3), 215-228.
Falletta, S. V. (2014). Organizational diagnostic models: A review & synthesis. Leadership & Organization Development Journal, 35(1), 14-30.
Garg, R., & Aggarwal, S. (2019). Evaluating ERP Software Packages: A Checklist Approach. International Journal of Computer Applications, 183(28), 10-15
Goodhue, D. L., & Thompson, R. L. (1995). Task-technology fit and individual performance. MIS Quarterly, 19(2), 213-236.
Hasan, S. M., & Morris, A. (2009). The importance of proof-of-concept studies in software engineering. In Innovations and Advances in Computer Sciences and Engineering (pp. 87-92). Springer.
Lee, G., & Xia, W. (2010). Toward agile: An integrated analysis of quantitative and qualitative field data on software development agility. MIS Quarterly, 34(1), 87-114.
Lichtenstein, Y., & Pliskin, N. (2008). A critical review of methods for handling uncertainty in decision-making under uncertainty. Risk Management and Insurance Review, 11(1), 63-78.
Liker, J. K., & Meier, D. (2013). Toyota talent: Developing your people the Toyota way. McGraw Hill Professional.
Nambisan, V. (2019). Evaluating and selecting software packages: A weight-based approach. International Journal of Management, 10(2), 114-123.
Nielsen, J. (2012). Usability 101: Introduction to usability. Nielsen Norman Group.
O’Mahony, M. J., & Miller, J. L. (2016). A framework for software selection. International Journal of Information Management, 36(1), 134-142
Pfleeger, S. L., & Atlee, J. M. (2014). Software engineering: Theory and practice (4th ed.). Pearson.
Pressman, R. S. (2014). Software Engineering: A Practitioner’s Approach (8th ed.). McGraw-Hill Education.
Saaty, T. L. (1980). The Analytic Hierarchy Process. McGraw-Hill.
Shelly, G. B., & Rosenblatt, H. J. (2011). Systems Analysis and Design (9th ed.). Cengage Learning.
Siau, K., & Tan, X. (2011). Strategies for conducting effective POC studies: An empirical analysis. Journal of Database Management, 22(3), 58-72.
Sommerville, I. (2016). Software Engineering (10th ed.). Pearson.
Management Software
Now that we have discussed the benefits of management software, as well as selection methodologies, let’s investigate actual software options. Public works management software generally has the following features.
- Asset Management
Management software generally facilitates the management of public infrastructure and assets by providing tools for tracking, maintenance, and inspections. It allows users to monitor asset conditions, schedule preventive maintenance, and track work orders to ensure assets are well-maintained and operational. - Work Order Management
Management software generally enables the creation, tracking, and management of work orders for maintenance and repairs. This feature ensures that tasks are efficiently assigned, prioritized, and completed, leading to better resource utilization and timely service delivery. - Spatial Integration
Management software generally offers geographic information system (GIS) integration, allowing users to visualize asset locations on maps. This spatial component enhances decision-making by providing a visual representation of asset distribution, helping users identify patterns and plan more effectively. - Permitting and Licensing
Management software generally supports permit and licensing management, enabling agencies to manage processes related to construction, land use, and other regulatory activities. This feature helps streamline application review, approval, and tracking. - Citizen Engagement
Management software generally promotes citizen engagement by offering resident portals and mobile apps. This allows citizens to report issues, track service requests, and receive updates on work progress. Improved communication enhances community satisfaction and transparency. - Regulatory Compliance
Management software generally helps organizations stay compliant with regulatory standards by tracking and documenting compliance activities. This ensures that public works operations adhere to legal requirements and regulations. - Analytics and Reporting
Management software generally provides robust reporting and analytics tools to generate insights from data. Users can track performance metrics, analyze trends, and make data-driven decisions to optimize operations and resource allocation. - Integration and Interoperability
Management software generally integrates with other systems, such as finance, permitting, and CRM systems, enhancing data sharing and collaboration across departments. This interoperability streamlines processes and reduces data duplication. - Cost Tracking and Budgeting
Management software generally enables organizations to monitor costs associated with maintenance, repairs, and projects. This feature assists in budget planning, resource allocation, and financial transparency. - Mobile Accessibility
Management software generally offers mobile applications that empower field workers with access to real-time data, work orders, and asset information. This mobile accessibility improves response times and enhances communication between field and office personnel.
Cityworks
Cityworks is a comprehensive public works software solution designed to enhance the efficiency, accountability, and transparency of public works and community asset management. It offers a range of functionalities that enable organizations to streamline operations, optimize resource allocation, and improve citizen engagement. The website can be found at: https://www.cityworks.com/
Star Programming
Star Programming is another public works management software. The website can be found at: https://www.starprogramming.com/
Tyler Technologies
Tyler Technologies provides software solutions designed to address the needs of public works and housing management. Their software offerings aim to enhance efficiency, streamline processes, and improve overall management in these sectors.
The website can be found at: https://www.tylertech.com/products
Tenant Cloud
Tenant Cloud is a program used for housing management. The website can be found at: https://www.tenantcloud.com/
TenantCloud offers a range of features designed to facilitate property management and tenant communication. Here’s a summary of some of its key features:
- Online Rent Collection
TenantCloud enables landlords to collect rent payments online from tenants. This feature provides convenience and transparency for both parties, helping to streamline the rent payment process. - Expense Tracking
The software allows landlords and property managers to track expenses related to their properties. This includes maintaining records of maintenance costs, repairs, and other property-related expenditures. - Tenant Screening
TenantCloud provides tools for conducting tenant screenings, including background checks and credit reports. This helps landlords make informed decisions about potential tenants. - Maintenance Requests
Tenants can submit maintenance requests through the platform, which landlords or property managers can then review and address. This feature helps ensure timely maintenance and repairs. - Lease Management
The software supports lease management by enabling landlords to create, share, and digitally sign lease agreements with tenants. It also helps manage lease renewal processes. - Online Portal
Both landlords and tenants have access to an online portal. Landlords can manage their properties, tenants, and finances, while tenants can view their rental history, submit requests, and communicate with their landlords. - Communication Tools
TenantCloud offers communication tools that allow landlords and tenants to communicate directly within the platform. This helps foster effective communication and eliminates the need for separate channels. - Document Management
The platform provides a secure way to store and manage important documents related to properties, leases, and transactions. This ensures easy access to essential information. - Financial Tracking
Landlords can track income and expenses related to their properties, helping with financial planning and reporting. - Tenant Portal
Tenants have access to a tenant portal where they can view their lease details, payment history, and submit maintenance requests. - Mobile App
TenantCloud offers a mobile app for both landlords and tenants, allowing them to manage their properties and tenancy on the go. - Marketplace Integration
The software integrates with various marketplaces to assist with advertising and finding new tenants.
Innago
Innago is a property management software designed to simplify the rental property management process for landlords and property managers. The website can be found at: https://innago.com/. Innago offers a range of features that aim to streamline tasks and improve communication between landlords and tenants. Here’s a summary of some of Innago’s key software features:
- Online Rent Collection: Innago facilitates online rent collection, allowing tenants to make rent payments electronically. This feature enhances convenience and helps landlords receive payments promptly.
- Tenant Portal: Innago provides tenants with access to a tenant portal where they can view their lease details, payment history, and submit maintenance requests. This portal serves as a centralized communication hub for tenants.
- Lease Management: Landlords and property managers can create and manage leases digitally through the software. Lease terms, renewals, and amendments can be easily tracked and managed.
- Maintenance Requests: Tenants can submit maintenance requests through the platform, which landlords or property managers can review and address. This feature helps ensure timely maintenance and efficient communication.
- Communication Tools: Innago offers communication tools that enable direct communication between landlords and tenants within the platform. This helps streamline discussions and reduces the need for external communication channels.
- Document Management: The platform allows for secure storage and management of essential documents related to properties and leases. This ensures easy access to important information.
- Financial Tracking: Innago helps landlords and property managers track income and expenses associated with their properties. Financial reports can be generated for better financial management.
- Tenant Screening: The software provides tenant screening features, including background checks and credit reports, to assist landlords in making informed tenant selection decisions.
- Customizable Leasing: Innago offers customizable lease templates that landlords can tailor to their specific requirements, ensuring accurate and comprehensive lease agreements.
- Mobile App: Innago provides a mobile app that allows landlords, property managers, and tenants to manage tasks and communicate on the go.
- Automatic Reminders: The platform can send automated reminders to tenants for rent payments, lease renewals, and other important dates.
- Accounting Integration: Innago integrates with popular accounting software, making it easier to manage financial data and generate reports.
- Online Maintenance Tracking: Tenants can track the status of their maintenance requests online, providing transparency into the maintenance process.
Journal Question
Using the forum labelled “Chapter 1 Lesson 2″ make a journal entry responding to the prompt below. Ensure that you title the entry “Lesson 2”. After writing a journal entry, go and make a comment on two other posts from your classmates. It can be about anything you noticed, liked, agreed with etc. The idea is to continue the dialogue about the topic.
Prompt: Do you think that software complicates your management process, or enhances it? Do you believe your community would benefit from a software management process? Or does the complexity of the software and cost not make it worth it?
|
Criteria |
Exemplary |
Accomplished |
Developing |
Beginning |
|
Purpose |
Strong voice and tone that clearly addresses the purpose for writing. |
Appropriate voice and tone. The purpose is largely clear. |
Attempts to use personal voice and tone. Somewhat addresses the intended purpose. |
Demonstrates limited awareness of use of voice and tone. Limited evidence of intended purpose. |
|
Understanding |
Many interesting, specific facts and ideas are included. |
Many facts and ideas are included. |
Some facts and ideas are included. |
Few facts and ideas are included. |
|
Conventions |
All grammar and spelling is correct. |
Only one or two grammar and spelling errors. |
A few grammar and spelling errors. |
Many grammar and spelling errors. |
|
Reply |
Made two significant contributions to the online forum. Highly supportive of others. |
Made one contribution to the online forum. Supported group members. |
Attempted to contribute to online forum but was vague and unclear in the writing. |
Minimally involved. Offered limited support to online group members. |